.png)
- Miami-Dade, Broward, & Palm Beach Counties
- (954) 729-0590
- gjroofingfl@gmail.com
DURABLE & BEAUTIFUL TILE ROOFING INSTALLATION
At G&J Roofing Corp., we specialize in professional tile roof installation across South Florida. Whether you’re replacing an aging roof or upgrading for style and durability, our expert team installs tile roofing systems with precision and care. From concrete roof installation to clay and specialty tiles, we deliver results designed to last for decades.
With over 20 years of local experience, our roofing company in South Florida knows how to install tile roof systems that meet Florida Building Code standards while enhancing your property’s beauty and value.
Get A Free QuoteWHY CHOOSE TILE ROOFING?
Tile roofing has been trusted in South Florida for generations, and for good reason.
Benefits of tile roofing installation include:
Longevity: Tile roofs can last 50+ years with proper care.
Wind & Weather Resistance: Built to withstand hurricanes, heavy rains, and extreme sun.
Energy Efficiency: Reflects sunlight and helps reduce cooling costs.
Curb Appeal: Available in a wide variety of colors, profiles, and textures.
Homeowners who choose our professional tile roofing installation enjoy a roof that’s both durable and beautiful. And if your existing roof is past repair, we also provide re-roofing service in South Florida to restore long-term protection and style.
OUR TILE ROOF INSTALLATION PROCESS
We follow a detailed process to ensure your tile roof is installed safely, efficiently, and to the highest standard.
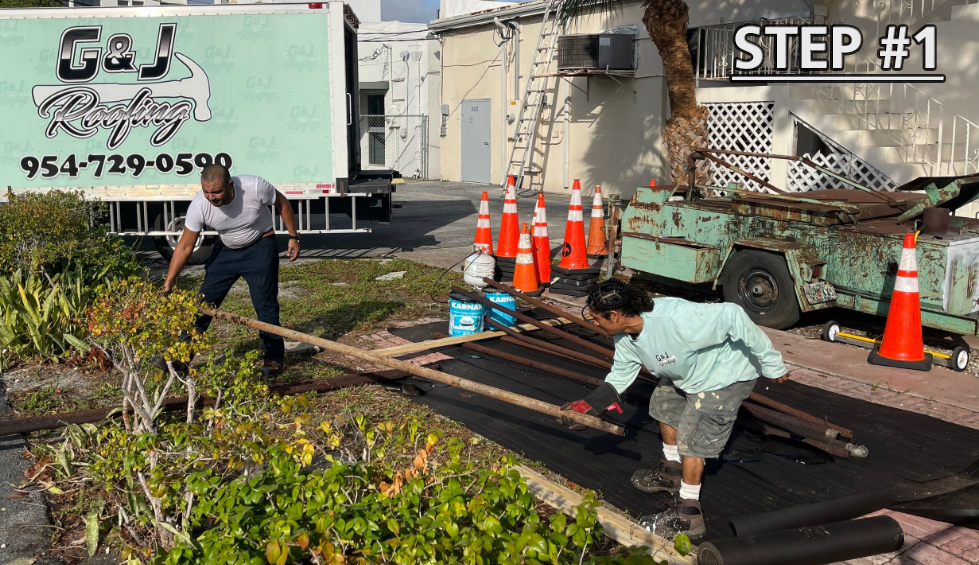
STEP #1 - Preparing the Work Site
Good site prep is key to keeping projects running in an efficient and safe manner. During this phase, the customer’s property is adequately protected from any falling debris, vehicle traffic, etc. Tarps are used to cover and protect landscaping, pool decks, walkways, etc. Plywood sheathing is used to protect driveways, garage doors, windows, air conditioning units, and pool equipment that might be exposed to falling debris, vehicle, or machinery traffic. G&J roofing takes pride in a clean, safe, and diligently managed jobsite.
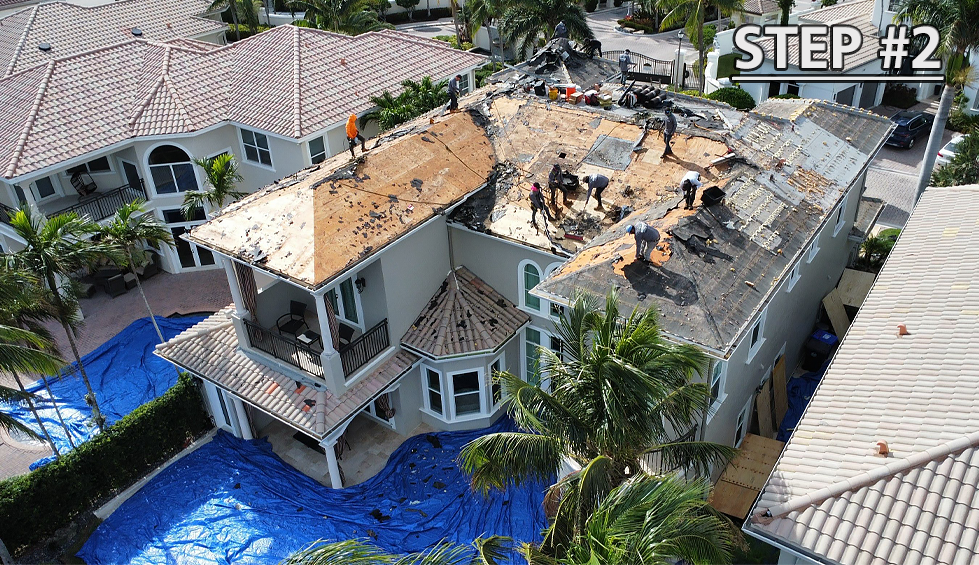
STEP #2 - Roof Tear Off
The entire existing roofing system will be torn off to expose the roof decking.
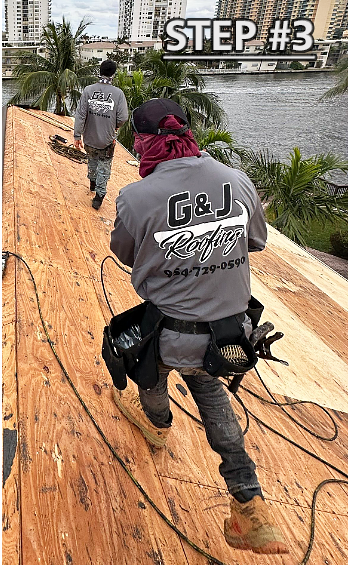
STEP #3 - Inspect Your Decking
The majority of residential roof decking in South Florida is composed of plywood sheathing supported by 2x4 trusses. Any rotten decking is removed and replaced with new sheathing. Any rotten support lumber and trusses are reinforced with new lumber.
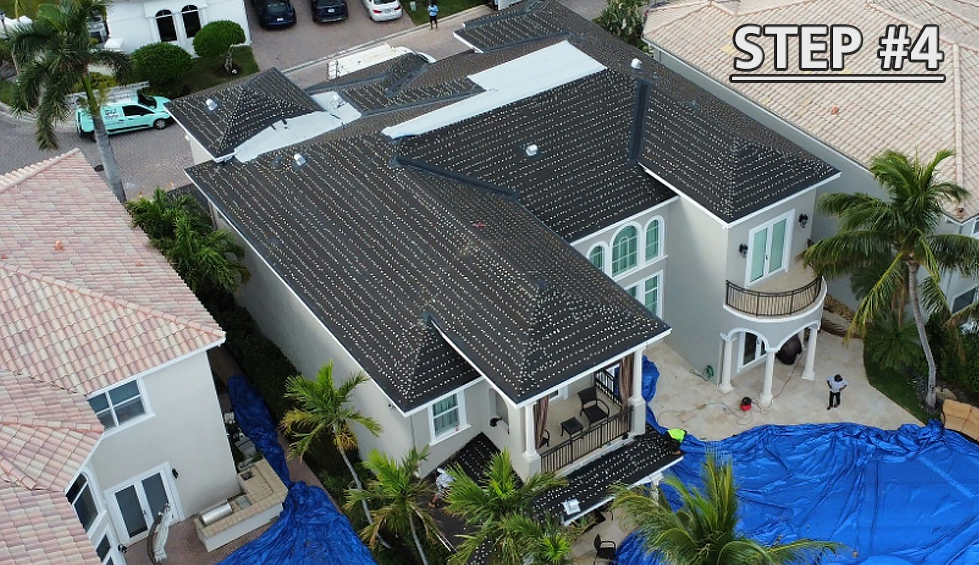
STEP #4 - Underlayment Installation
The first layer to the roofing system for your tile roof is the installation of a #30 felt. The #30 felt is mechanically fastened with 1”-1/4 nails and tin caps. Once the felt is installed your home is “in the dry.” In the event of rain your property is protected by the first layer of your roofing system.
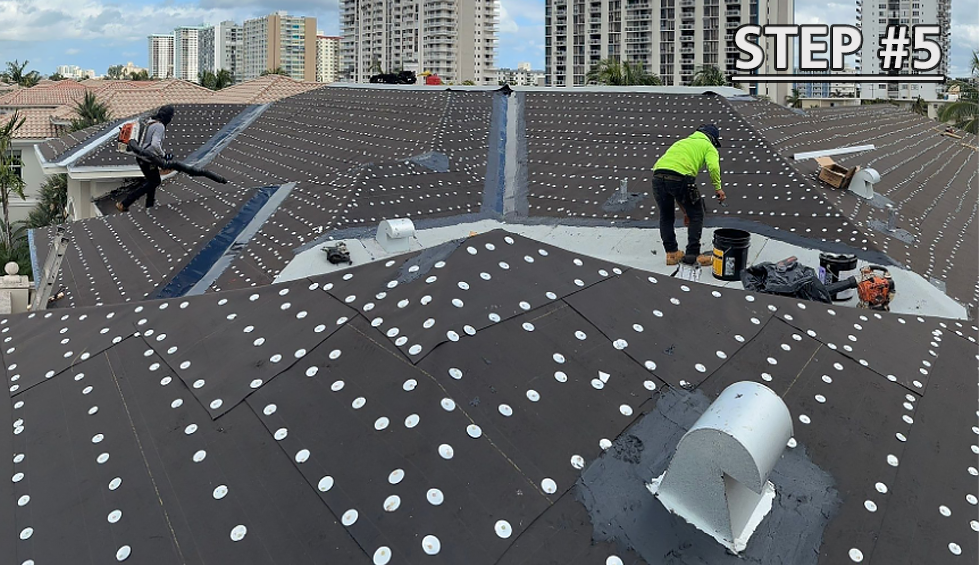
STEP #5 - Flashing, Valley Metal, Plumbing Stacks & Roof Vents
All wall flashing, plumbing stacks, and attic vents are mechanically-fastened to the roof, set in a full-bed of roofing cement, and sealed using a three-course membrane system.
STEP #6 - Drip Edge
The Drip Edge is installed to seal and protect the roof perimeter. Customers can choose from galvanized, aluminum, or copper eve drip.
STEP #7 - Secondary Water Barrier Installation
All G&J residential tile roofing systems use a Polyglass Tumax tile roof underlayment that carries a 30 year warranty . This material is self-adhered and back nailed along the seal laps. All valleys are woven and sealed with a bead of roofing cement finished with a roller. All hips are back nailed and sealed with a three-course membrane system. The concrete roof tile is installed over this layer of the roofing system.

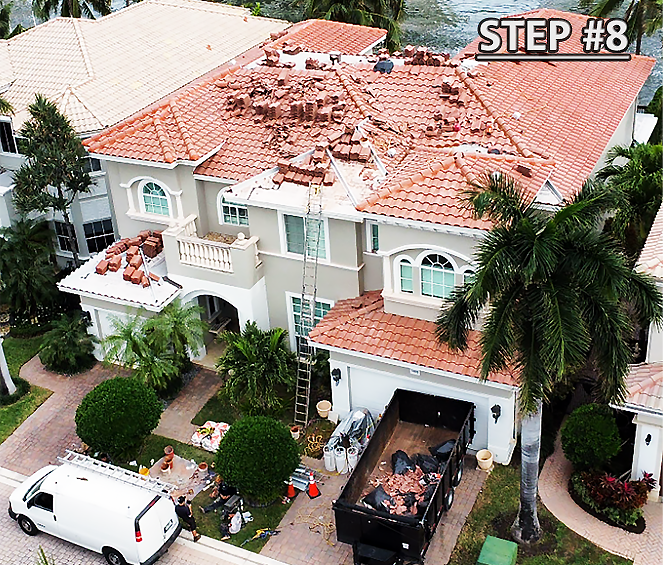
STEP #8 - Installation of New Roofing Tiles
Customers may choose from any profile or color available through our list of manufacturers. All concrete roof tiles are set in manufacturer approved roof tile foam adhesive. Installing the roofing tiles with foam rather than the traditionally mechanically fastened approach eliminates the risk of a potential leak through a fastener hole.
STEP #9 - Worksite Cleanup
At G&J Roofing we take jobsite cleanliness very seriously. We protect and clean up your property as if it was our own. A thorough cleanup of the entire worksite takes place following roof installation. Magnets are run throughout the entire yard to ensure the safety of tenants, pets, children, car tires, etc. G&J Roofing sends a pressure washing crew to clean all pool decks, driveways, walkways, etc. Should you have a pool, G&J Roofing will send a pool service to service the pool and leave it cleaner than it was when we arrived. The entire property is swept and blown clean, leaving no trace that a roofing company was ever even on site.
Call Now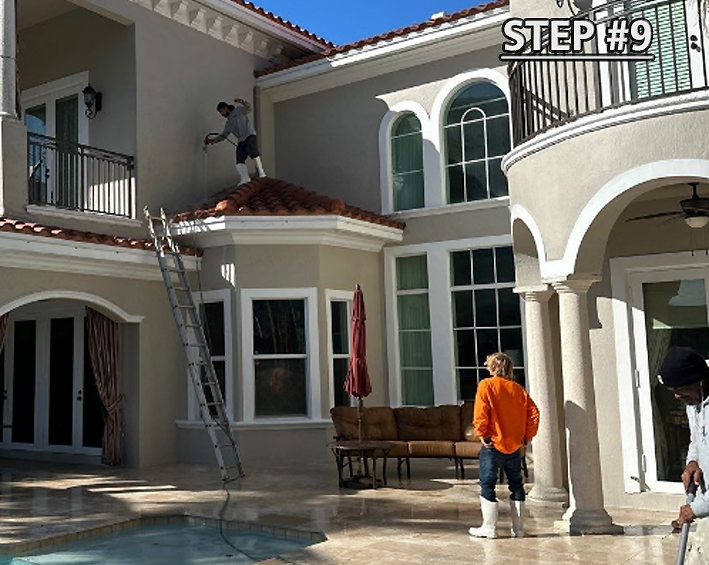
CONCRETE ROOF INSTALLATION OPTIONS
Concrete tile roofs are one of the most popular systems in South Florida thanks to their durability and style flexibility.
Our concrete roof installation service offers:
A wide range of colors and profiles to match your home’s architecture.
Hurricane-rated tiles that meet strict South Florida wind codes.
Manufacturer partnerships with trusted brands like Eagle and Boral.
Concrete tiles provide the look of clay at a more affordable price while maintaining strength and longevity.
WHY CHOOSE G&J ROOFING FOR TILE ROOF INSTALLATION
Licensed, insured, and local South Florida experts
Over 20 years of experience in installing, repairing, and cleaning roofs in South Florida
High-quality materials from trusted manufacturers
Clean, safe, and carefully managed job sites
Full property protection during installation
CUSTOMER TESTIMONIALS
“5 🌟 service. Called first thing in the morning after noticing a cracked roof tile, they came out immediately! Thank you again guys! …” – Tonytalksalot
“This company is great to work with. Did a great job on roof repairs that were needed at a well known restaurant in Hollywood. They showed up on time, were reliable, very well priced and hard working. Would definitely hire them again for our next job.” – Ilona Allen
“Great job on the roof at Mom's house, these guys had pictures of the job as it went, Cleaned up after themselves. Crew respectful and sharp, Boss is down to earth and does what he says. Nice roof and they finished before the rain started! Thanks Gunner!” – Paula Zugar
Get A Free QuoteFREQUENTLY ASKED QUESTIONS
How long does a tile roof installation take?
Most projects take 2–3 weeks, depending on roof size and weather.
What’s the difference between clay and concrete roof tiles?
Clay tiles offer classic style and can last over 75 years. Concrete tiles are versatile, durable, and more cost-effective.
Is foam adhesive better than nails when you install tile roof systems?
Yes. Foam adhesive eliminates nail holes that can lead to leaks and provides superior wind resistance.
How often should tile roofs be inspected after installation?
We recommend inspections every 1–2 years and after major storms to catch small issues early.